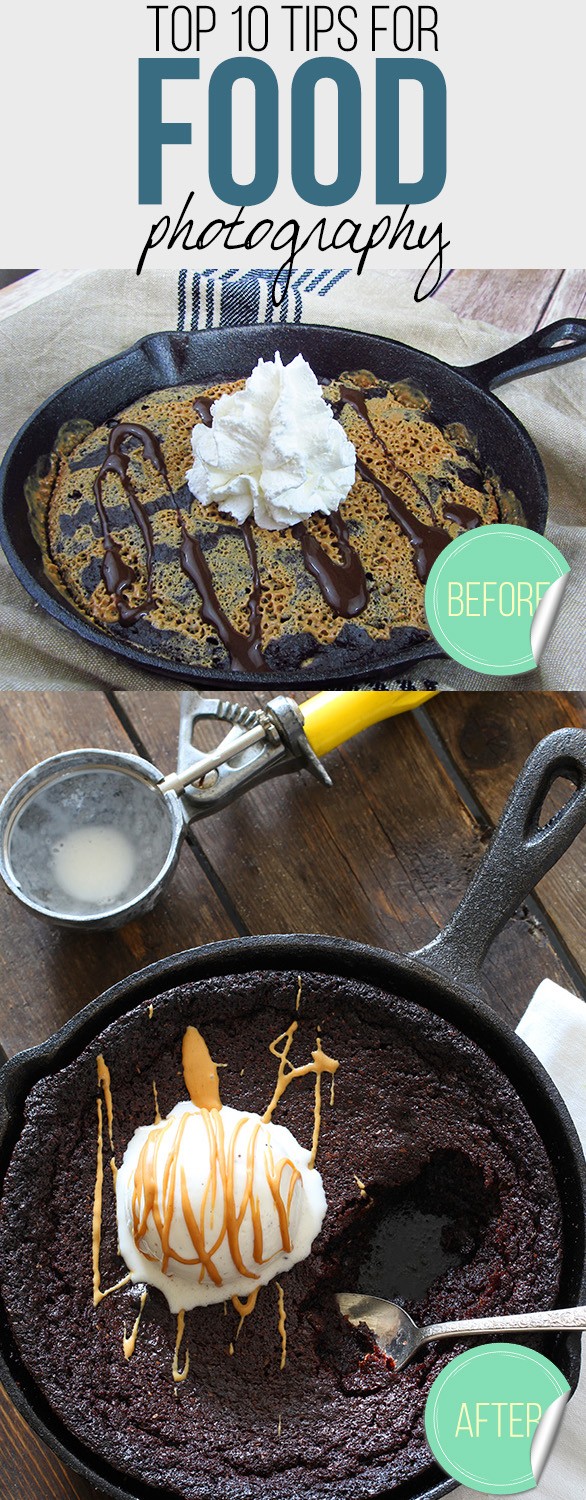
What Full Time Blogging Has Taught Us!
We’ve been blogging and photographing food for a little over a year now. It’s amazing how quickly you learn when you embark on a project and fully immerse yourself in the subject matter. We are full-time bloggers so we eat, sleep and breath this stuff! Thanks to the internet, a few helpful individuals and trial and error, we have collected a few key tips on how to make your food photos look amazing!
Read on to learn about our experiences or first, familiarize yourself on How to Start a Food Blog!
Use Natural Light Only
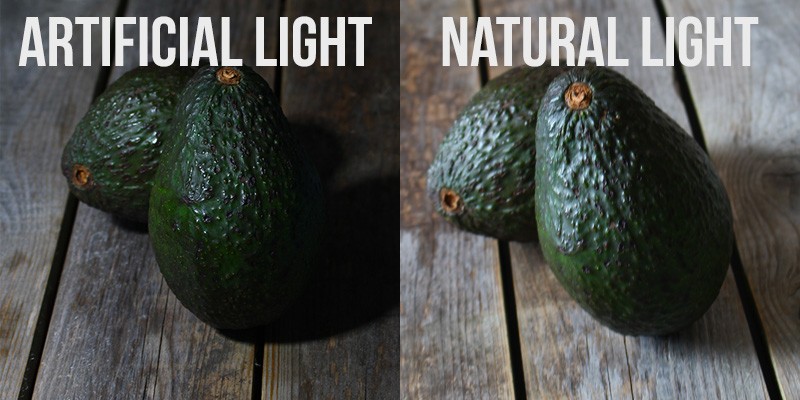
The biggest tip I can give is the use natural light only. Study the way natural sunlight comes into your home and pick the best place to take the photos of your food. It might not be in the kitchen! We end up taking pictures in a den/lounge area of our home or even in a side entrance hallway. The reason we choose the hallway is because there is only one light source and that’s the glass side door. The glass is also frosted which makes it a great light diffuser. Look for an area in your home that is bright but not in direct sunlight. Drape a thin white curtain over your window to help diffuse the light. There should be only one source of light coming in, so a corner kitchen with wrap around windows might not be the ideal place. You can also use a bounce board to add extra light where you think you need it; it’s much harder to take away light.
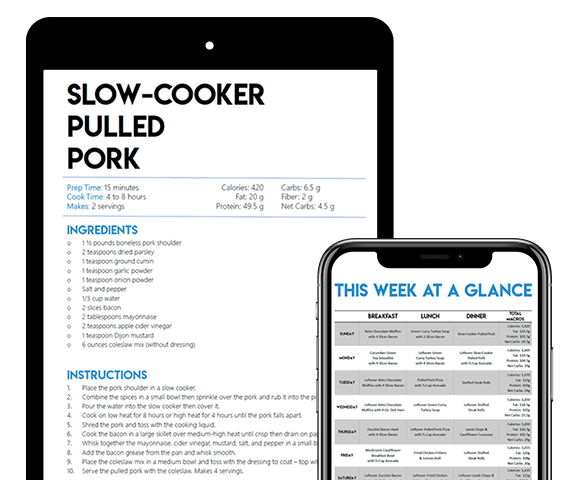
4-Week Keto Meal Plan
- 4 Weeks of Delicious Keto Recipes!
- Leftovers and Bulk Preps Included
- Maximize Your Keto Diet's Success
Tip: You can easily get a cheap bounce board by purchasing large oak tag paper or thick poster board from a office supply store or pharmacy!
If you live in a dark area or can only take pictures in the evening, you can invest in some good artificial daylight lights and recreate the light, but natural light is the way to go. Here’s a more affordable set too!
Find Appropriate Props & Beautiful Backgrounds
You want to fill up your frame with props that make sense. If you’ve got an ice cream recipe, place a few spoons, sprinkles or an ice cream scoop in the shot. You also want to make sure the props are theme appropriate. If it’s a bright and clean dish, use new utensils and keep the background light and bright. If the shot is more “organic” and rustic, use some vintage props you found in a thrift shop or garage sale.
Consider placing a few fresh ingredients into the frame that you may have used in the recipe. If you made a chicken noodle soup, maybe include some whole carrots in the background! Fresh herbs are your best friend; a sprinkle of chopped basil, parsley or cilantro can really bring a picture to life.
As for the backgrounds, many food bloggers love the look of white marble under their food, which really helps everything pop. We don’t have a marble counter top so we purchased a marble tile from Home Depot for about $5 and that’s served us well! You can also buy some marble contact paper and turn a portion of (or your entire) counter top into a marble slab!
Another great option is wood. A real wooden table would be a great background to shoot on. If you don’t have one, we recommend purchasing or finding some scrap wood and making a few backgrounds.
We found some wooden fence pieces someone was throwing out, sanded, stained and/or painted the front and backs to create 4 new backgrounds. They store easily and are relatively lightweight and inexpensive when compared to purchasing a whole table.
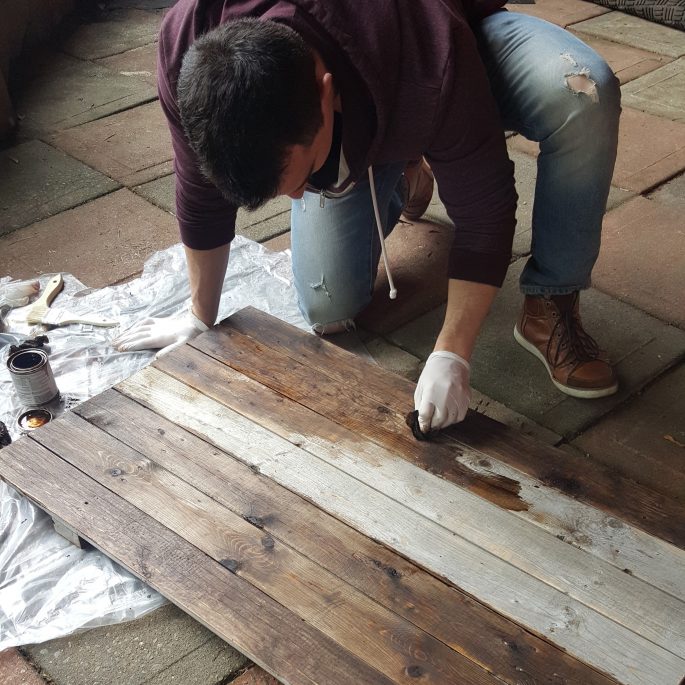 Let us know if you would be interested in seeing a tutorial on how this is done!
Implement the Rule of Thirds
The Rule of Thirds suggests that you not place the subject of your photos directly into the center of the frame. It becomes a bit boring if the subject is in the center and doesn’t leave much room for props, background or anything left to the imagination. It’s alright to cut off a bit of your subject by placing it in the side of the shot, leaving space for props and a sliver of the background. Here’s a great example of the Rule of Thirds. Notice how the subject is on the side of the shot, leaving room for the beautiful background to shine through.

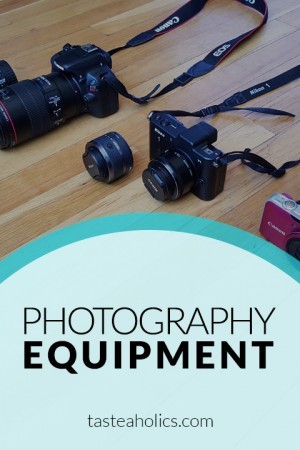
Invest in a Good Lens, Save Money on the Body
We did a ton of research on lenses before most recently upgrading. It seems as though many food bloggers and photographers agree that the Canon EF 100mm F/2.8 IS USM Macro Lens was, hands down, the best lens for up close food photography. We waited for some good Black Friday deals and ordered both the lens and the Canon Rebel SL1 body along with it. You can try to find some used camera bodies on Amazon, eBay or Craigslist. We recommend buying lenses new and unused. If you want to learn more about our camera equipment, we wrote a whole blog post on it earlier this year. Check it out!
Invest in a Good Tripod
 This may be as important as the camera and lens you’re using. A good tripod will make your life easier and your shots look much better. You want a stable tripod that’s also very flexible. If it’s hard for you to adjust the camera, you’re going to be spending a lot more time getting the frame just right. We recommend a tripod with a ball socket head so that adjusting the camera is as easy as moving your wrist.
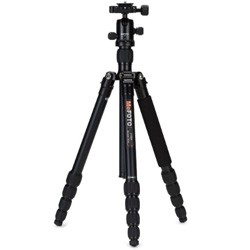
We recently purchased this MeFoto Travel Tripod because we plan on traveling very soon. It’s not only stable, but super light weight (3.6 pounds) and collapses into only 15 inches! Perfect for fitting into a carry-on.
The hot shoe is tiny and let’s you remove the battery and SD card without having to remove the shoe which is great for saving time. Lastly, the legs are flexible and flip 180 degrees so you can get all the angles and placements you’ll ever need with this tripod.
Try Different Angles and Leave Room for Cropping
When using a tripod, it’s easy to get stuck on one angle and be left with 100 very similar pictures and not much to choose from. We recommend taking a few photos free-hand to see where the food looks the best. After you’ve found the sweet spot, then bring out the tripod and set it up at a similar angle.
After you got a good shot, redo the angle. Grab the camera and find another interesting angle. We usually try an overhead whenever possible and table-level. Table-level means we take the photo of the food at an angle as if we were sitting at a table looking at it from our natural height.
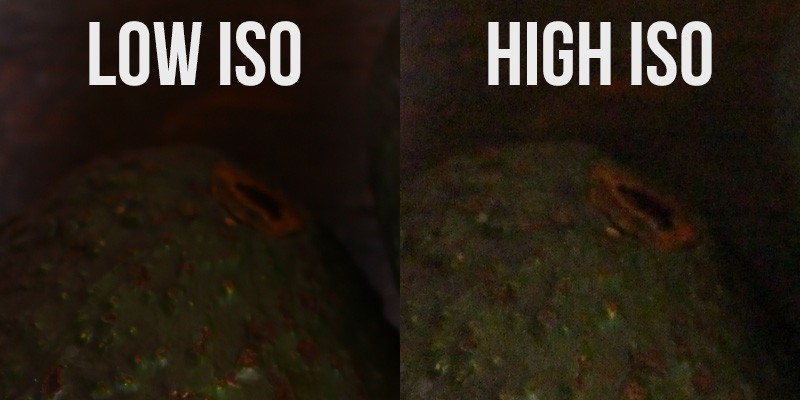
Keep Your Shots on a Low F-stop and a Low ISO
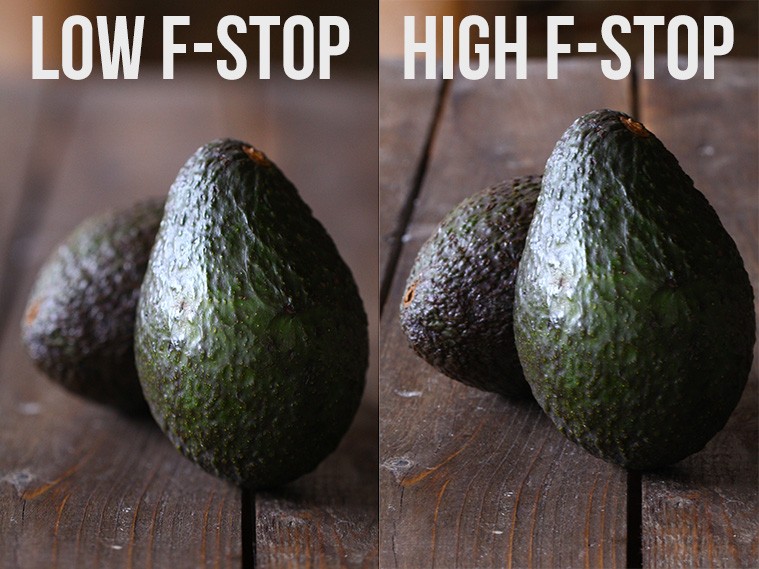
A low F-stop simply means that the depth of view is shallow – a.k.a. The background will be very blurry while the subject will be in focus. This helps highlight the recipe while keeping some of the background as a complement. A low ISO means the lens is not as sensitive to light as it would be on a high ISO. You would use a high ISO in very dark situations where you want the lens to pick up as much light as it can. As handy as this is, a very high ISO can make your photos grainy. Try to keep the ISO at 100 or 200 and play around with the shutter speed instead. A slow shutter speed will let more light into the lens. However, this also means a tripod needs to be used. Human hands can only be so steady. If you’re shooting free hand, you might need to increase the shutter speed to avoid any blurry shots.
Create Layers in Your Shot to Tell a Story
A photo of food doesn’t have to be only food. Create layers in your shot and dimensions to tell a story. Have props in the background as well as the foreground. Have some things cut off, have a few things sprinkled, peeled or dirty to make a shot look like you’re right in the middle of cooking. A dirty wooden spoon can make the viewer think about how fresh and hot the dish must be. A few broken egg shells would work too. The shot shouldn’t always look like it’s being served in a restaurant. A home cooked meal is much more appealing to some. Try to tell a story with your photo!
Don’t Make it Look Too Perfect
Don’t spend too much time trying to make your dish look perfect. Embrace the imperfections and know that food is never perfect. Food happens organically and that only makes it more beautiful. Don’t be afraid to scatter some herbs all over the plate and onto the tabletop/background you’re using. Make sure none of the props are too parallel to each other or the shot may start to look a bit overdone.
Learn Adobe Photoshop Well
Photoshop is your friend! A great picture is rarely just that. There is always some post-production involved. However, the better the picture is, the less time you will spend in photoshop. When we first started, we would spend more time fixing the photos than we would spend taking the photos! Spend time on each shot and make everything fit your liking. There are only a few things we adjust when we go into post-production.
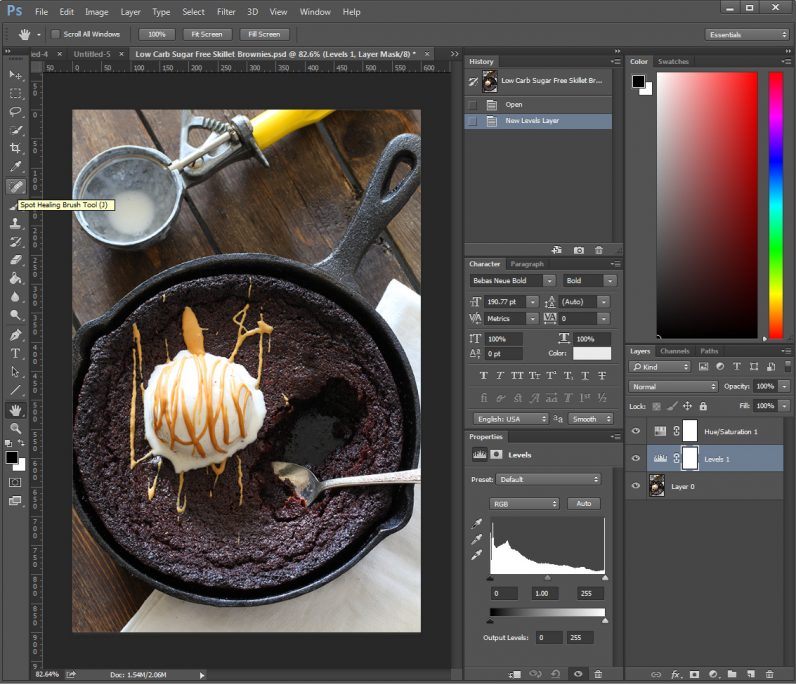
- Levels – sometimes a shot may come out too orange or too cold. We can adjust the white balance and levels to counteract that. Here’s a great tutorial on how to play with the levels.
- Saturation – we will commonly saturate our photos just a bit. This brings out the natural colors of the food and makes the dish look more appetizing and fresh. Be careful not to oversaturate the photo though. Colors like red, orange and yellow oversaturate very quickly. Colors like blue, green and purple can be saturated a bit more.
- Healing – we use the healing tool to clean up any spots or crumbs that we decide are too distracting. There might be some splotches left on a white plate we didn’t notice that are easily cleaned up in Photoshop.
We want to give a special thanks to Allan of Hollan Publishing for spending some time with us and really improving our food photography skills. We found these tips to be really invaluable and help our blog look more professional and appealing to our readers.
Do you have any tips you’d like to share? What do you do to make your food photos look amazing? Tell us in the comments and we could include it in our list!
NUTRITIONAL DISCLAIMER
The content on this website should not be taken as medical advice and you should ALWAYS consult with your doctor before starting any diet or exercise program. We provide nutritional data for our recipes as a courtesy to our readers. We use Total Keto Diet app software to calculate the nutrition and we remove fiber and sugar alcohols, like erythritol, from the total carbohydrate count to get to the net carb count, as they do not affect your blood glucose levels. You should independently calculate nutritional information on your own and not rely on our data. The website or content herein is not intended to cure, prevent, diagnose or treat any disease. This website shall not be liable for adverse reactions or any other outcome resulting from the use of recipes or recommendations on the Website or actions you take as a result. Any action you take is strictly at your own risk.
You’ll Love Our Keto in Five Cookbooks!
We believe that the key to success is simplicity and satisfaction with your diet. That’s why we created our Keto in Five ecookbook series which includes Breakfast in Five, Lunch in Five, Dinner in Five & Dessert in Five.
Each ebook contains 30 recipes. Every recipe is made with just 5 ingredients and has up to 5 grams of net carbs. That means you can have seconds of any meal and you’ll still be within your daily carb limit!


Dr. Rosmy Barrios, MD is an aesthetic medicine specialist whose work focuses on patients who are treated for obesity, metabolic syndrome, and other weight-related issues through nutritional analysis, keto diet programs, and supporting medications.
- EPIC Keto Krate Haul! - February 13, 2020
- 30+ Low Carb Snacks (Keto Snacks) with Little to No Prep - January 1, 2019
- Keto Browned Butter Pumpkin Spice Latte [VIDEO] - November 13, 2018