Starting Tasteaholics
4-Week Keto Meal Plan
- 4 Weeks of Delicious Keto Recipes!
- Leftovers and Bulk Preps Included
- Maximize Your Keto Diet's Success
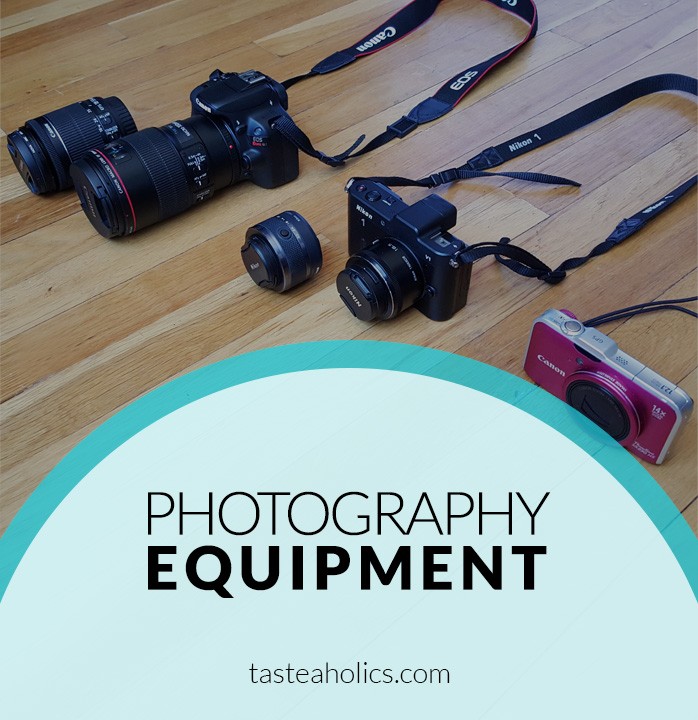
We started Tasteaholics in February of 2015 with a simple point-and-shoot! We didn’t know how to style and photograph food, set up a shot with lighting or how to use props. What we did know was that it would take a bit of practice, research and persistence!
Humble Beginnings!
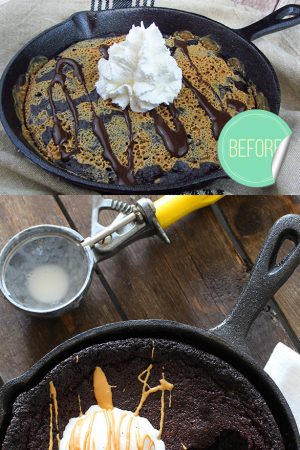
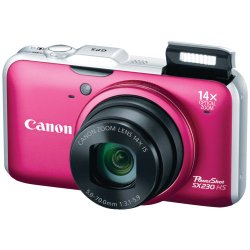
Our very first camera was the Canon PowerShot SX230HS. It was something Vicky had around for years and only ever used on vacations. Although it’s a simple point-and-shoot, some of our first and most popular recipes came from it like our lava cake!
Improving Our Lighting
After 2 months of trying to catch the sun to shoot photos in our east facing NYC apartment (not good for dinners!), we decided to invest in a light source. The best one we could find on Amazon for a good price was the LimoStudio Photography Lighting Kit. For $50, we got 3 stands (2 tall, 1 short), 3 umbrellas, 3 daylight CFL bulbs and a carry case. We still use it almost every day for evening photography!

Our First Camera Upgrade!
In May we upgraded to a Nikon 1 V1 camera. This camera is considered a gateway DSLR camera. It’s not truly a DSLR because it’s mirrorless but you can swap out the lenses and it also includes some advanced settings and options.
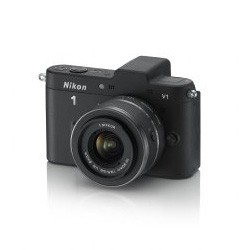
After some research, we purchased a lens that would work best for our food photography needs: 1 Nikkor 18.5MM F/1.8. It had a very low F-stop which is great for focusing on a small depth of field while blurring the scene around it. With its much higher quality shot than the stock lens and a $200 price tag, it was a considerable upgrade for us from the Nikon V1 standard lens (and especially the point-and-shoot).
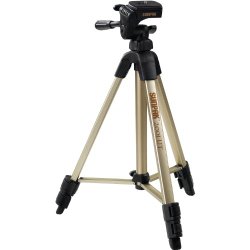
We also purchased a tripod called the Sunpak 200i UT. We still use it to this day for all our photos and videos! It’s light and sturdy – a great starter tripod.

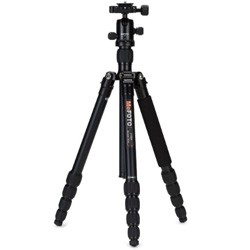
Selecting a Good Tripod
We had traveling in mind when purchasing our tripod, the MeFoto Travel Tripod. We’ve been using it for over 6 months both at home and on the go and are very happy with it. It’s extremely flexible, versatile and sturdy. It’s not only stable, but super light weight (3.6 pounds) and collapses into only 15 inches! Perfect for fitting into a carry-on.
It has a ball and socket head which is greatly for getting any angle quickly and precisely.
The legs are flexible and flip 180 degrees so you can get all the angles and placements you’ll ever need with this tripod.
The hot shoe is tiny and let’s you remove the battery and SD card without having to remove the shoe which is great for saving time.
Overall, the tripod is a real pleasure to use.
The Big Upgrade
Around December of 2015, as Tasteaholics continued growing both in traffic and income, we decided it was time to upgrade our equipment to a more professional level!
Our primary needs were:
- Crisp, close-up shots
- High quality video
- Low F-stop
- Image stabilization (in case we’re on the go or handheld)
- Secondary lens for general outdoor/casual photography
Our budget was about $1300. In our line of work, the lens is more important than the camera body so we opted for a lower-end DSLR camera that meets all of our requirements at a minimal price. We then splurged for a higher-end lens that exceeded our requirements and fit within the remainder of our budget.
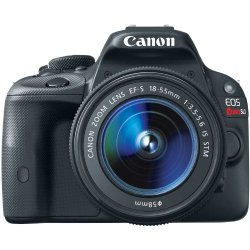
The Camera: Canon EOS Rebel Sl1
The Canon EOS Rebel SL1 is one of the smallest and lightest DSLRs you can buy. It fits really well in our hands and is extremely light. It has a top-notch touchscreen with all the settings we’ll ever need.
We got the standard kit with the EF-S 18-55mm IS STM Lens. The lens is pretty good. It has image stabilization (important for when you’re not using a tripod) and a solid zoom. We use it when we make videos, take overhead and step-by-step photos and general, non food-related photography.
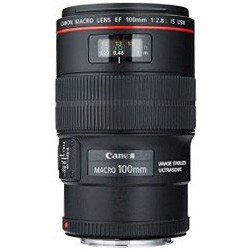
The Lens: Canon EF 100MM F/2.8L IS USM Macro
The 100MM F/2.8L IS Macro lens is a beast of a lens and does everything we read about, dreamed about and much more! It’s a macro lens with a 1:1 ratio at 12” meaning it captures the actual size of the object when shooting from 1 foot away. It includes image stabilization which is great for shooting freehand at lower shutter speeds. Finally, it has a 2.8 F-stop (more of an option than a necessity). When we tried shooting at 2.8, the focal area was WAY too small, so 99% of the photo was blurry! We keep it at around 8 now when shooting larger dishes and around a 5 when shooting smaller desserts.
If you decide to get this lens, let us know and we’ll guide you through some of the settings that we found to work well for us!
Oopsie Rolls Before & After

What We’ve Learned In Our Journey So Far
- Lighting is super important. Daylight is key. If you have issues with catching daylight consider getting some decent lights and diffusers. Always have a white or silver reflector handy.
- Food has a wide variety of shape, color and size so you’ll need a variety of dishware and glassware to create the right mood/scene.
- Less is more. Props are a nice tool for assisting with the theme if used correctly (especially if the food is looking a bit lackluster). Just keep in mind that minimalism is the best way to let the food really shine! Try to create a beautiful dish that speaks for itself.
- A high-end lens and camera can improve your photos, but are not a requirement. We’ve done some of our best work with a point-and-shoot and an entry-level mirrorless camera. The final image quality comes from planning, cooking, setting up, lighting, shooting and editing. Having nice photo equipment is icing on the cake.
NUTRITIONAL DISCLAIMER
The content on this website should not be taken as medical advice and you should ALWAYS consult with your doctor before starting any diet or exercise program. We provide nutritional data for our recipes as a courtesy to our readers. We use Total Keto Diet app software to calculate the nutrition and we remove fiber and sugar alcohols, like erythritol, from the total carbohydrate count to get to the net carb count, as they do not affect your blood glucose levels. You should independently calculate nutritional information on your own and not rely on our data. The website or content herein is not intended to cure, prevent, diagnose or treat any disease. This website shall not be liable for adverse reactions or any other outcome resulting from the use of recipes or recommendations on the Website or actions you take as a result. Any action you take is strictly at your own risk.
You’ll Love Our Keto in Five Cookbooks!
We believe that the key to success is simplicity and satisfaction with your diet. That’s why we created our Keto in Five ecookbook series which includes Breakfast in Five, Lunch in Five, Dinner in Five & Dessert in Five.
Each ebook contains 30 recipes. Every recipe is made with just 5 ingredients and has up to 5 grams of net carbs. That means you can have seconds of any meal and you’ll still be within your daily carb limit!


Dr. Rosmy Barrios, MD is an aesthetic medicine specialist whose work focuses on patients who are treated for obesity, metabolic syndrome, and other weight-related issues through nutritional analysis, keto diet programs, and supporting medications.
- Keto-Friendly Food Swaps for Common Ingredients - July 11, 2023
- Keto Diet and Acne: Reducing Breakouts and Promoting Clear Skin - July 9, 2023
- Can the Keto Diet Help with Epilepsy? - July 7, 2023